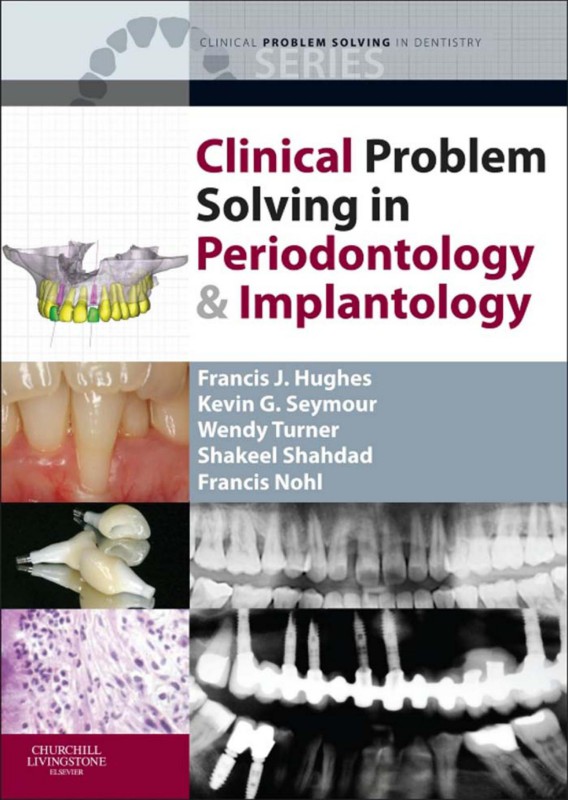
Clinical Problem Solving in Periodontology and Implantology 1st Edition by Francis J Hughes, Kevin G Seymour, Wendy Turner ISBN 0702037400 9780702037405


Original price was: $50.00.$25.00Current price is: $25.00.
Authors:Francis J. Hughes; Professor Kevin G. Seymour; Wendy Turner; Shakeel Shahdad; Francis Nohl , Series:Dentistry [99] , Tags:Medical; Dentistry; General; Periodontics; (Clinical Problem Solving in Dentistry) , Author sort:Hughes, Francis J. & Seymour, Professor Kevin G. & Turner, Wendy & Shahdad, Shakeel & Nohl, Francis , Ids:Google; 9780702052071 , Languages:Languages:eng , Published:Published:Aug 2012 , Publisher:Elsevier Health Sciences , Comments:Comments:Clinical Problem Solving in Periodontics and Implantology – a new title in the successful Churchill Livingstone’s Clinical Problem Solving in Dentistry series – provides a highly visual step-by-step guide to the practical management of a wide variety of clinical problems commonly seen in practice. Containing over 400 high-quality photographs, many in full colour, the book is written in an easy-to read ‘how to’ style and contains a large number of real life clinical cases carefully presented to maximise learning outcomes for the reader. Covering the core aspects of practice, Clinical Problem Solving in Periodontics and Implantology will be of value to all undergraduate dental students and those embarking on post-graduate training in periodontology and implantology.More than 400 colour illustrations present clinical, diagnostic and practical information in an easy-to-follow manner Contains ‘practical tips’, ‘how to’ boxes and other useful aide-mémoires Practical approach to the subject makes learning especially easy Designed to help the reader organise their knowledge into a clinically useful format Explores treatment alternatives and evaluates their advantages and disadvantages Practical approach to the subject makes learning especially easy
Clinical Problem Solving in Periodontology and Implantology 1st Edition by Francis J Hughes, Kevin G Seymour, Wendy Turner – Ebook PDF Instant Download/Delivery. 0702037400, 9780702037405
Full download Clinical Problem Solving in Periodontology and Implantology 1st Edition after payment
Product details:
ISBN 10: 0702037400
ISBN 13: 9780702037405
Author: Francis J Hughes, Kevin G Seymour, Wendy Turner
Clinical Problem Solving in Periodontics and Implantology a new title in the successful Churchill Livingstone’s Clinical Problem Solving in Dentistry series provides a highly visual stepbystep guide to the practical management of a wide variety of clinical problems commonly seen in practice.
Clinical Problem Solving in Periodontology and Implantology 1st Table of contents:
Section 1 Periodontal assessment and diagnosis
Chapter 1 Periodontal assessment
Introduction
What factors in the dental history might indicate periodontal disease is present?
What is the relevance of a patient’s medical history to his or her periodontal care?
Why is it necessary to take a social history?
Table 1.1 Effects of smoking on periodontal health
Clinical periodontal examination
Table 1.2 Examples of partial and full mouth plaque scoring indices
Fig 1.1 Plaque and bleeding scores.
Fig 1.2 Ramfjord teeth are used as a representation of the full mouth for evaluation of plaque (FDI notation: 16, 21, 24, 36, 41, 44).
Fig 1.3 The WHO-C (clinical) probe. The key elements of this probe are a ball end with a 0.5-mm diameter, a black band at 3.5–5.5 mm, and a second black band at 8.5–11.5 mm.
What are the methods for screening for periodontal disease?
What do I need to carry out a BPE and how often should it be recorded?
Table 1.3 BPE scoring codes
How do I record a BPE screening examination?
Is the BPE used for children and teenagers?
How would I score a sextant where there are no probing depths greater than 5 mm but the furcation is detected?
Can I probe around implants?
How do I interpret the BPE scores to reflect the treatment needs of an individual patient?
What are the limitations of the BPE?
Table 1.4 Interpretation of BPE scores
Case 1
Why are the BPE scores inconsistent with the minimal attachment loss experienced?
Case 2
Fig 1.4 (A) Case 1; (B) Case 2.
Why did the BPE scores at recall not show any improvement?
Comprehensive periodontal assessment
Fig 1.5 (A) Periodontal probe with Williams markings at 1, 2, 3, 5, 7, 8, 9, 10 and (B) UNC probe with 1, 2, 3, black band 4–5, 6, 7, 8, black band 9–10, 11, 12, 13, black band 14–15.
Fig 1.6 The Chapple constant force periodontal probe. (A) The probe is placed in the pocket and (B) the correct force is applied when the probe is aligned with the centre of the handle.
Fig 1.7 Severe gingival recession involving UL5 and UL6 and the furcation area in both teeth can be visualized.
Fig 1.8 Suppuration from the periodontal pocket palatal to UL1.
Fig 1.9 Using a Nabers probe to detect the buccal furcation (A) and the distal furcation (B).
Table 1.5 Common indices used in periodontal assessment
Table 1.6 Factors that may influence the accurate measurement of pocket depths
What are clinical attachment loss and clinical attachment level?
Width of attached gingiva: How much is needed?
Fig 1.10 This lower left mandibular incisor shows a decreased width of attached gingiva on the labial aspect compared to the other lower incisors, which may not be compatible with gingival health.
When would I carry out a radiographic assessment?
Fig 1.11 A panoramic radiograph demonstrating generalized horizontal bone loss supplemented with a periapical of the UL1 showing vertical bone loss almost to the apex.
What are the appropriate radiographs to take?
Is there a difference between horizontal and vertical bone loss?
Assessment of co-morbidities
Fig 1.12 (A) Horizontal bone loss occurs when the level of the bone is below the CEJ (arrow) but equal interdentally (white dashed line), whereas in vertical bone loss, bone crest is more apical to the CEJ adjacent to one tooth than to the other (white dashed line in B).
Fig 1.13 Radiographic appearance of perio/endo lesion on UR5 resulting from periodontal pocket extending to the apex of the tooth.
Fig 1.14 A rather innocuous-looking furcation lesion on LR6 turns out to be a perio/endo lesion, and the tooth has become nonvital (although at this stage there are no apical changes). Despite the presence of localized bone loss on the LR7 mesially associated with the overhanging restoration, there is no sign of periodontitis elsewhere, and the lesion on LR6 is diagnosed as being of primarily endodontic origin associated most likely with the deep DO restoration. Providing periodontal treatment for this furcation lesion will result in failure because the original diagnosis is actually an endodontic lesion resulting in a perio/endo lesion.
Conclusions
Chapter 2 Classification of periodontal diseases
Introduction
What are the current possible periodontal diagnoses?
Table 2.1 Importance of a diagnosis
Table 2.2 Classification of periodontal diseases and conditions
How do I reach a periodontal diagnosis? Basic checklist
Gingival diseases
Case 1
Case 2
Fig 2.1 Case 1: (A) Presentation of well-established gingivitis and (B) signs of resolution occurring 2 weeks after giving oral hygiene instruction.
Fig 2.2 Case 2 on presentation: Drug-induced gingival overgrowth associated with nifedipine therapy.
Periodontal diseases
Chronic periodontitis
Table 2.3 Features of aggressive periodontitis
Aggressive periodontitis
Case 3
Fig 2.3 Case 3 on presentation.
Is this plaque-related periodontitis?
Case 4
Fig 2.4 Clinical and radiographic presentation of Case 4.
Is this plaque-related periodontitis?
Case 5
Is this plaque-related periodontitis?
Case 6
Fig 2.5 Clinical and radiographic features of Case 5 on presentation. The gingivae look largely uninflamed, but radiographically, severe generalized bone loss is evident. There has been drifting of the upper left anterior teeth.
Fig 2.6 Clinical and radiographic presentation of Case 6 at age 13 years. The plaque control is good, and the gingivae appear uninflamed, illustrating the importance of proper periodontal screening of all patients, even where their gingival health is apparently good. The radiographs show up to 50% bone loss affecting the lower incisor teeth and early bone loss at the mesial sites of the first molars.
Fig 2.7 Radiographic presentation of a 24-year-old man who was originally from Trinidad. There is severe bone loss, which particularly affects the first molars and incisors but has also spread to affect many other teeth. The appearance and clinical features are suggestive of an initial diagnosis of localized aggressive periodontitis that had now progressed to a generalized aggressive form of the disease.
Comparing chronic and aggressive periodontitis: A diagnostic dilemma?
Table 2.4 Clinical features of chronic and aggressive periodontitis
Conclusions
Chapter 3 Periodontal diagnosis: Systemic factors
Conditions that may affect periodontal management
Systemic aetiological factors in periodontal disease
Systemic factors predominantly affecting the gingival tissues
Pregnancy
Fig 3.1 Swollen and inflamed gingivae, most marked here in the upper incisor regions, in pregnancy gingivitis. (Corsodyl staining of composite restorations in lower incisors is also evident.)
Other hormonal factors
Fig 3.2 Pregnancy epulis arising from buccal interdental papilla between LR6 and LR7. Note the size of the lesion, which extends to the occlusal table, as seen by the indentation of the upper molar cusp that is visible. Note also profuse pregnancy gingivitis affecting the other teeth.
Drug-induced gingival enlargement
Phenytoin-induced gingival enlargement
Fig 3.3 Marked, predominantly fibrous, gingival enlargement in a patient taking phenytoin.
Ciclosporin
Fig 3.4 Gingival enlargement in a patient taking ciclosporin following a renal transplant 2 years previously. Note the marked enlargement distal to LL6 but also signs of enlargement affecting the other papillae.
Calcium channel blocking drugs
Fig 3.5 Calcium channel blocker-induced gingival enlargement in a patient taking nifedipine for hypertension.
Fig 3.6 Characteristic shiny red appearance of gingivae in xerostomia, in this case due to habitual mouth breathing.
Xerostomia
Systemic factors that increase susceptibility to periodontitis
Diabetes mellitus
Glycaemic control
Diabetes mellitus and periodontal disease
Treatment of periodontitis in patients with DM
Diagnosis of DM during periodontal examination
Effects of treatment on glycaemic control
Fig 3.7 Recurrent necrotizing periodontitis in a patient with HIV infection (and with poor oral hygiene). Note the “punched out” loss of interdental papillae and loss of periodontal attachment interdentally.
HIV infection
Case report
Neutrophil disorders
Fig 3.8 Histological pictures of an advanced periodontal lesion. (A) Tooth showing severe attachment loss and deep pocket. (B) Detail of periodontal pocket highlighted in panel A. Neutrophils have migrated into the pocket to effectively “wall off” the subgingival plaque (arrows). C, cementum of tooth; PE, pocket epithelium; PL, subgingival plaque.
Fig 3.9 Periodontal disease in cyclic neutropenia. Note the ulceration at the gingival margins and extending to the attached gingivae, together with marked inflammation, swelling, and redness.
Genetic diseases
Nutrition and periodontitis
Other medications
Table 3.1 Summary of systemic factors that may influence presentation or progression of periodontitis
Summary
Chapter 4 Periodontal diagnosis: Risk factor assessment
Introduction
About risk factors
Risk factors for periodontal disease
Smoking
Systemic factors
Genetic factors
Specific bacteria
Psychosocial factors
Assessing future risk
Tooth-related risk factors
Calculating risk
Periodontal disease as a risk factor for systemic disease
Summary
Chapter 5 Is it periodontal disease?: Other conditions affecting the periodontal tissues
Introduction
Case 1
Table 5.1 Summary of conditions that may present in or affect the periodontal tissues
Table 5.2 Clinical features that may suggest that a periodontal condition is not the result of periodontal disease
Fig 5.1 Suspected acute herpetic gingivostomatitis. The gingivae are red and inflamed, with diffuse ulceration seen at the gingival margins of the palatal aspects of the upper teeth.
Fig 5.2 More typical appearance of acute herpetic gingivostomatitis. Gross redness and swelling of the gingivae, with discrete ulcers noted at the gingival margins of the lower central incisors, combined with characteristic ulcerative lesions on the labial mucosa.
Case 2
Fig 5.3 Appearance of lower gingivae showing fiery red attached gingivae (“desquamative gingivitis”) and the presence of white lacy striae affecting the labial mucosa. Note how the marginal gingivae appear relatively unaffected in some areas. This is a classical presentation of oral lichen planus.
Case 3
Fig 5.4 Acute myeloid leukaemia. The gingivae are red and swollen, and the attached gingivae have a diffuse ulcerated appearance. There is spontaneous gingival bleeding in the upper left region that the patient reported had persisted for a number of hours.
Fig 5.5 A 64-year-old woman presented complaining of swollen gums. She was noticeably breathless and had bruising in some areas on her limbs. She reported that she had stopped cleaning her teeth because they bled for many hours after brushing. The dramatic swollen appearance of the gingivae in this case is clearly unlikely to have a primarily periodontal cause. She was urgently referred for haematological investigation, where a diagnosis of acute myeloid leukaemia was made.
Case 4
Fig 5.6 Case presentation with gingival swelling and fiery red attached gingivae, not always extending to the marginal gingivae.
Fig 5.7 Rotational tomogram showing irregular extensive vertical bone loss.
Case 5
Fig 5.8 Marked clinical improvement of gingival condition at 6-week review following completion of nonsurgical periodontal treatment combined with adjunctive antibiotics. There is some localized persistence of the fiery red gingival appearance (notably in the upper anterior region), but in general the improvement is dramatic.
Fig 5.9 Diffuse granulomatous appearance of attached gingivae in a patient known to suffer from sarcoidosis.
Fig 5.10 Fiery red linear inflammation of attached gingivae.
Case 6
Fig 5.11 Extensive irregular palatal ulceration and visible blistering within the lesions.
Case 7
Fig 5.12 Rotational tomogram showing extensive lytic radiolucent lesions in the jaws (A) and with principal lesions outlined for clarity (B).
Fig 5.13 (A) Periapical radiograph at initial presentation: bone loss extends to the apex of the tooth; there is evidence of apical root resorption. (B) Periapical radiograph 6 weeks later—extensive destruction of periapical bone. (C) Clinical appearance. (D) Rotational tomogram showing evidence of periodontal bone loss particularly affecting the upper molars.
Case 8
Case 9
Fig 5.14 Clinical appearance showing distal drifting of UL1, fibrous swelling of mesial interdental papilla, and extensive diffuse palatal swelling. Note the absence of obvious gingival inflammation.
Fig 5.15 Radiographs showing complete periradicular bone loss around UL1 and normal bone elsewhere on rotational tomogram.
Summary
Section 2 Periodontal treatment
Chapter 6 Initial treatment planning
Introduction
The treatment planning process
Assessing prognosis
Table 6.1 Patient-level and tooth-specific factors influencing long-term prognosis
Fig 6.1 Anterior clinical view of Case 1. The gingivae are relatively uninflamed and there is some recession, particularly of the lower anterior teeth. Note also tobacco staining of teeth.
Fig 6.2 Six-point pocket charting with recession, mobility, and furcation involvement recorded.
Case 1
Fig 6.3 Plaque and bleeding distribution at initial assessment.
Fig 6.4 Periapical radiograph of UR456.
Planning extractions
Table 6.2 Good and poor reasons for extracting teeth
Fig 6.5 Case 2: Six-point pocket charting with recession, mobility, and furcation involvement recorded.
Case 2
Fig 6.6 Rotational tomogram of Case 2.
Fig 6.7 Hypothetical treatment planning scenario in which LR45 have been previously extracted.
Summary
Chapter 7 Behaviour change: Plaque control and smoking cessation
Introduction
Plaque control
Oral hygiene methods to control plaque formation
Toothbrushing
Fig 7.1 Manual and powered toothbrushes.
Table 7.1 Toothbrushing techniques
Fig 7.2 Demonstrating the modified Bass technique using a model and manual toothbrush.
Fig 7.3 The modified Bass technique in action.
Fig 7.4 Brushing the upper premolar region buccally.
Fig 7.5 Using an electric toothbrush.
Fig 7.6 Demonstrating the use of interdental brushes on a model.
Fig 7.7 An array of interdental brushes in various sizes.
Interdental cleaning
The ability of the patient to perform these methods
Table 7.2 Attributes of good communication skills for giving oral hygiene instruction
Fig 7.8 Using dental floss.
The motivation of the patient
Summary
Smoking cessation
Behavioural and pharmacological support
Chapter 8 Nonsurgical treatment
Introduction
What is nonsurgical treatment?
Scaling technique
Table 8.1 Types of scaling instruments
Fig 8.1 Tips of left and right Sickle scalers and the Jacquette scaler (right), which is a type of Sickle scaler used for anterior teeth. These instruments are used for supragingival scaling.
Fig 8.2 A selection of curettes used principally for subgingival areas. (A) Barnhart universal curettes, numbers 1/2 (top) and 5/6 (bottom). (B) Close-up of tip, which has two cutting sides on its blade. (C) A selection of Gracey-type curettes. From top, numbers 13/14, 11/12, 9/10, 7/7, and 5/6. (D) A close-up of the tip of a Gracey number 11 showing the single “cutting” side.
Fig 8.3 Cross-sectional diagram of the use of curettes on root surface. (A) Universal curette with roughly semicircular cross-sectional profile; the cutting edge of the instrument is at roughly 90° to the tooth surface. (B) Gracey curette with single cutting side applied to root surface.
Particular difficulties of root surface debridement
Fig 8.4 Periodontal hoes. (A) Close-up photograph of hoe tips. Note the dark appearance of the tip, which is made of tungsten carbide. (B) Cross-sectional diagram of the use of a hoe on a root surface. The instrument is positioned apically below the calculus (C) and scaled coronally.
Fig 8.5 Root surface of an extracted tooth showing widespread diffuse build up of subgingival calculus (arrows).
Fig 8.6 An extracted lower molar demonstrating the difficulty of debriding the furcation region with a standard curette, which is almost too wide to access the furcation entrance.
Treatment outcomes
Summary
Fig 8.7 Periodontal charting of a patient before and after nonsurgical therapy. Numbers in red show sites exhibiting bleeding.
Fig 8.8 Clinical photos of patient with severe gingival inflammation, particularly associated with the calculus lingually on the lower incisors, and the improvement in swelling seen after initial therapy. In this case, some inflammation still persists, and further nonsurgical treatment is required, although the initial response to treatment is very encouraging for both patient and clinician. (Top) Preoperative; (bottom) postoperative.
Chapter 9 Reassessment: Time for decision making
Assessing treatment outcomes
Reasons for poor responses to treatment
Fig 9.1 Six-point probing pocket chart of lower right sextant of a patient at baseline (prior to treatment) and at reassessment following completion of initial nonsurgical treatment. It is clear that there has been an excellent response to treatment overall. However, the BPE score for this sextant is “4” at baseline and remains “4” postoperatively because of the persisting 6-mm pocket at LR6 lingually. BPE does not provide any information about where there has been a good (or poor) response, and it completely fails to identify the generally excellent response to treatment in this sextant.
Table 9.1 Diagnosing and managing inadequate treatment responses
Fig 9.2 Six-point probing pocket chart at initial presentation.
Remedies for inadequate treatment outcomes
Fig 9.3 Rotational tomogram showing irregular bone loss with infrabony defects evident.
Case 1
Case 2
Fig 9.4 Six-point probing pocket chart at reassessment compared to initial presentation.
Fig 9.5 Six-point probing pocket chart 6 months after completion of repeating RSD in anterior sites and the surgical treatment in all posterior areas.
Fig 9.6 Case 1. Clinical appearance of patient 6 months following surgical treatment. Note the healthy appearance of gingivae (A) and the gingival recession around surgical sites in molar regions resulting from the apically positioned flap procedures (B).
Fig 9.7 Case 2. Six-point probing pocket chart at presentation and 6 weeks after initial therapy.
Case 3
Fig 9.8 Case 3. Rotational tomogram showing severe generalized bone loss.
Fig 9.9 Case 3. Clinical appearance after initial therapy.
Fig 9.10 Six-point probing pocket chart at reassessment by the periodontist.
Summary
Chapter 10 Surgical treatment of periodontal pocketing
Introduction
Indications for surgery
Contraindications for surgery
Surgical techniques
Table 10.1 Advantages and disadvantages of periodontal surgery compared to nonsurgical treatment
Fig 10.1 Diagrammatic representation of the principles of pocket correction surgery (open flap debridement). (A) Deep pocket; (B) flap raised to expose defect; (C) after debridement of defect, flap replaced as close as possible to original level of attachment; (D) healing after 2 or 3 months—pocket reduction results from formation of fibrous gingival cuff, long junctional epithelium, and some gingival recession.
Case 1
Fig 10.2 Diagrammatic representation of the principles of pocket elimination surgery (apically positioned flap). (A) Deep pocket with infrabony component; (B) flap raised to expose defect, including infrabony component (arrows); (C) debridement of defect and recontouring of bone to remove infrabony component surgically and create bony anatomy to facilitate flap position; (D) flap replaced apically and sutured in place to eliminate existing pocket. (Note recession deliberately caused to eliminate pocket.)
Fig 10.3 Detail of pocket chart showing isolated persisting 7-mm pocket (A) buccally and (B) lingually at reassessment following nonsurgical treatment.
Fig 10.4 Case 1: Initial incision of inverse bevel flap for treatment of mesial defect of UR5.
Fig 10.5 Diagram of inverse bevel flap incision. The incision is made at approximately 10° to the tooth, extending approximately 1 mm from the gingival margin down to the alveolar bone.
Fig 10.6 Palatal flap incised and elevated.
Fig 10.7 Buccal flap elevated to allow access to the root surface in the infrabony defect on mesial of UR5.
Fig 10.8 Simple interrupted black silk suture placed in the papilla.
Case 2
Postoperative management
Fig 10.9 Case 2: Despite excellent plaque control, severe localized pocketing was found at UR34 (A and B). (C) Following raising of a flap, in addition to being able to access the defect, a buccal groove was noted on the UR4.
Summary
Chapter 11 Other surgical procedures
Introduction
Gingival procedures to remove excess gingiva (gingivectomy)
Case 1: Drug-induced gingival enlargement
Could this have been carried out by alternative surgical methods?
Crown lengthening surgery
Table 11.1 Causes of gingival enlargement
Table 11.2 Advantages and disadvantages of different flap techniques for a gingivectomy
Fig 11.1 Case 1 on presentation. Gross gingival enlargement was seen.
Fig 11.2 Case 2 panoramic radiograph showing minimal alveolar bone loss.
Fig 11.3 An inverse bevel incision was made to approximately the position of the cementoenamel junction, buccally (A) and palatally (B), combined with an intracrevicular incision (C and D) to allow excision of the desired width of gingiva.
Fig 11.4 A third incision was performed with an Orban interdental knife along the alveolar crest.
Fig 11.5 The secondary flap was curetted away from the tooth and shows the amount of gingival tissue excised.
Fig 11.6 The flaps were closed with interrupted sutures.
Fig 11.7 Case 1, 2 months after surgery.
Main indications
What is the biologic width and why is it important?
Fig 11.8 The biologic width (BW) is made up of connective tissue (CT) and epithelial attachment (EA) parts.
Fig 11.9 Case 2 on presentation, with swollen gingivae associated with the crown margins and immediate bleeding following periodontal probing.
Fig 11.10(top) and Fig 11.11 Intracrevicular and inverse bevel incisions were made to raise a full-thickness flap to allow access to alveolar bone crest.
Case 2: Biologic width invasion
Fig 11.12 Alveolar bone was removed buccally to ensure at least 3 or 4 mm from the bone crest to the proposed restoration margin.
Fig 11.13 After 6 months of healing, the gingival margins were stable and clinically healthy.
Fig 11.14 Final restorations.
Fig 11.15 Case 3 on presentation showing the 24 fractured at gingival level.
Case 3: Fractured tooth with lack of crown height
What other treatment options would be possible?
Fig 11.16 The amount of supragingival tooth tissue gained after crown lengthening surgery.
Treatment timing
Root resection procedures
Case 4: Root resection
Fig 11.17 Case 3. The cast post and core with restoration margins supragingivally.
Fig 11.18 Case 4 periapical radiograph showing extensive bone loss associated with the distal root of 46.
Fig 11.19 Case 4 post root canal treatment.
Fig 11.20 Case 4 after the full-thickness mucoperiosteal flap is raised to visualize the extent of bone loss and the furcation area.
Fig 11.21 Resection through the distal root.
Fig 11.22 The root has been elevated, and the edges of the root trunk have been finished to avoid any ledges.
Fig 11.23 The final restoration.
Summary
Chapter 12 Periodontal regeneration
Introduction
Overview of regenerative therapies
Guided tissue regeneration
Graft materials
Fig 12.1 Diagram of the principles of guided tissue regeneration. (A) Pocket formation and infrabony defect. (B) Flap raised surgically, and granulation tissue from infrabony defect removed. (C) Membrane placed over defect. (D) Flap replaced and sutured. Membrane forms a barrier to exclude gingival tissues from surgically debrided defect and promotes wound repopulation by cells migrating from the periodontal ligament and bone (arrows).
Fig 12.2 Membrane placed in defect during GTR surgery.
Biologically active materials
Table 12.1 Types of graft material for periodontal regeneration
Applications of regenerative therapies
Fig 12.3 “Spontaneous” regeneration. Detail of rotational tomograms of a 36-year-old man with localized periodontitis particularly affecting the UL5 distally, the LL6 distally, and the LL7 mesially. The patient was treated with oral hygiene instruction and root surface debridement followed by 3-monthly maintenance visits. (A) The pretreatment view. (B) The view 1 year postoperatively. Although the quality of the radiographs is rather poor and not directly equivalent, there appears to have been significant gain in bone height on all three of these defects, most markedly on UL5. In addition, in the postoperative radiograph, a well-formed lamina dura is seen at these sites, which is considered to be indicative of good bony healing.
Case 1
Fig 12.4 Clinical presentation of Case 1. Suppuration of deep pocket at LR6 clinically, and radiographically there is a deep infrabony pocket that extends apically to approximately 80% or more of the root surface.
Fig 12.5 Regenerative surgical treatment of LR6. (A) Flap is raised to access the deep infrabony pocket distally and that extends buccally to the furcation region. (B) Defect packed with allograft material. (C) Flap is replaced and carefully sutured to obtain primary closure and good wound stability.
Fig 12.6 (A) Clinical appearance and (B) radiographic outcome 7 months postoperatively. The tissues are uninflamed, and there has been complete bony infill of the infrabony defect.
Outcomes of periodontal regenerative treatments
Fig 12.7 Radiographic appearance of outcome of surgery with EMD on infrabony defect on mesial of LL6 in a 47-year-old woman. Marked but incomplete bone fill of defect is seen 2 years after surgery. It was associated with pocket reduction from 9 to 3 mm.
Fig 12.8 Radiographic appearance of outcome of surgery with EMD on infrabony defect on mesial of LL6 in a 24-year-old woman with localized aggressive periodontitis. Incomplete bone fill of defect is seen 1 year after surgery. Pocket reduction from 8 mm initially to 4 mm is seen. (Postoperatively, the patient was also receiving orthodontic treatment for alignment of incisors.)
Table 12.2 Favourable and unfavourable factors affecting outcomes of regenerative techniques
Future developments
Chapter 13 Local and systemic antimicrobial agents
Introduction
Antiseptic agents and chemical plaque control
Chlorhexidine
Other antiseptic agents and plaque control
Table 13.1 Antiseptic agents used in oral care products
Fig 13.1 Catch-22? Severe gingival inflammation associated with poorly fitting margins of upper anterior crowns. The inflammation is unlikely to resolve while the margins are still there, but one cannot successfully remake the crowns until the inflammation has resolved. In this case, the crowns can be removed and replaced with well-fitting laboratory-made acrylic temporary crowns. To assist the gingival resolution, adjunctive use of chlorhexidine together with good plaque control measures would be appropriate.
Other antiplaque agents
Systemic antimicrobial agents
Acute conditions
Treatment of periodontal pocketing
Table 13.2 Antibiotic regimes for adjunctive periodontal treatment
Case 1
Fig 13.2 Clinical appearance of Case 1 at presentation. The gingivae look largely healthy and plaque control was good, but many localized deep pockets were evident on probing.
Case 2
Fig 13.3 Rotational tomogram of Case 1 at presentation. Multiple infrabony pockets are evident, and there is a perio/endo lesion on LR7. Note also arch wire/composite splints fitted to the upper and lower anterior regions.
Fig 13.4 Pocket chart of Case 1 taken at initial diagnosis and 3 months after completion of nonsurgical treatment combined with adjunctive doxycycline. Note the dramatic improvement in all deep sites with the exception of LR6 mesially.
Fig 13.5 Pocket chart of Case 2 at initial presentation, 6 months following completion of active therapy, and a further 6 months later, showing serious generalized recurrence of disease.
Fig 13.6 Rotational tomograms of Case 2 taken at initial presentation (A) and at diagnosis of disease recurrence (B). Note marked progression of disease particularly at LR7 and UR6.
Fig 13.7 Pocket chart of Case 2 at relapse (12 months after surgery completed) and 3 months after completion of new round of RSD with adjunctive antibiotics.
Locally delivered antimicrobial agents
Table 13.3 Potential advantages and disadvantages of locally applied antimicrobial agents compared with systemic agents
Chapter 14 Gingival recession
Introduction
Assessment
Case 1
Table 14.1 Aetiological factors in gingival recession
Table 14.2 Miller’s classification of gingival recession defects
Table 14.3 Problems associated with gingival recession
Fig 14.1 Generalized gingival recession in Case 1. Gingivae are uninflamed, and plaque control is good. There is thin gingival biotype and signs of tooth erosion and toothbrush abrasion.
Case 2
Fig 14.2 (A) Clinical presentation in Case 2. Localized Miller class II recession defect of LR1 associated with periodontal disease, high frenal attachment, and labial position of the tooth. Plaque accumulation is visible at the gingival margin of the recession. (B) Radiograph shows normal interproximal bone levels.
Table 14.4 Treatments for dentine sensitivity
Surgical procedures for treating recession defects
Fig 14.3 Connective tissue graft procedure. (A) Split-thickness flap raised over defect. (B) Harvesting connective tissue graft. The palatal epithelium is elevated and the graft dissected out from the subepithelial tissue. (C) Graft sutured in place over defect with resorbable sutures. (D) Wound closed by coronally advancing the split-thickness flap and sutured in place.
Fig 14.4 Follow-up of connective tissue graft 6 months postoperatively. There is full coverage of the previous recession defect and good levels of attached gingivae.
Recession following periodontal treatment
Table 14.5 Surgical techniques used for the management of gingival recession defects
Fig 14.5 Generalized recession in a patient who has had periodontal treatment. There is marked recession involving the interproximal regions, resulting in the appearance of spaces between the teeth due to recession of interdental papillae, so-called “black triangle disease.”
Case 3
Fig 14.6 (A) Clinical and (B) radiographic features of Case 3. There has been dramatic recession following resolution of the very deep pockets affecting particularly the upper anterior teeth.
Fig 14.7 Acrylic gingival veneer to hide the gross gingival recession resulting from periodontal treatment. (The contour of the anterior teeth has also been slightly adjusted with composite and slight incisal grinding to improve the appearance of the incisors.)
Fig 14.8 Gingival veneer constructed to conceal unsightly crown margins exposed by gingival recession after periodontal treatment.
Chapter 15 Postoperative care and periodontal maintenance therapy
Introduction
Managing the consequences of periodontal disease
Case 1
Table 15.1 Patient-centred unwanted consequences of periodontal disease
Case 2
Fig 15.1 Case 1 (A) at presentation and (B) at extractions and fitting of immediate acrylic partial denture. (C) Teeth replaced with resin-bonded bridge with abutments at UL3 and UR3.
Fig 15.2 Case 2. (A) Radiograph of upper central incisors showing severe bone loss, particularly at UL1. (B) Fibreglass-reinforced splint placed on incisors. The splint has had to be placed quite apically to avoid occlusal interferences, and it requires very careful maintenance because of the increased risk of plaque accumulation. (C and D) Labial view of splinted teeth. Composite buildups have been placed as part of the splint to improve contours of teeth, particularly at UR1 distal and UL1 mesial.
Table 15.2 Methods of providing permanent splinting
Fig 15.3 Example of arch wire splint. Wire is prebent on a model in the laboratory and retained with composite resins. These splints are used widely as orthodontic retainers but are also effective in other situations.
Fig 15.4 Composite resin splint. This is useful as a temporary splint because it can be placed relatively quickly, but when not reinforced the material is too brittle to use successfully for permanent splinting.
Case 3
Periodontal maintenance therapy
Fig 15.5 Case 3. (A) Patient with suppuration, pain, and mobility of UL1. The tooth was extracted and most of the root cut off and then bonded as a bridge pontic using fibreglass-reinforced composite splinting. (B and C) Palatal and buccal views of tooth/splint at the time of extraction and reattachment to the splint. The root extends to the socket but actually sits on top of this, allowing resolution of inflammation and socket healing to occur as normal.
Case 4
Fig 15.6 Rotational tomogram radiographs of Case 4. (A) At initial presentation. (B) At routine maintenance visit 23 years later. Note the absence of significant changes in bone levels between visits.
Fig 15.7 Clinical appearance of Case 4 at visit 23 years after initial therapy. Note the healthy periodontal tissues, severe recession and Rochette splint on LR teeth.
Summary
Section 3 Introduction to dental implantology
Chapter 16 Indications for dental implant treatment
Why does the patient wish to replace missing teeth?
To improve aesthetics?
Fig 16.1 Both of the central incisors have suffered irreparable damage as a result of trauma. Periradicular infection at the upper right central incisor is manifest as a fluctuant swelling on the buccal mucosa.
To improve masticatory function?
To improve speech function?
To enable wind instrument playing?
To regain what has been lost?
What are the prosthodontic advantages of implant treatment?
To avoid tooth preparation and possible sequelae
Table 16.1 Indications for dental implant treatment
Fig 16.2 An edentulous patient with loose, uncomfortable dentures who wishes to discuss the possibility of using dental implants to improve the situation.
Fig 16.3 Developmental hypodontia treated with bridges utilizing full-coverage retainers necessitating removal of substantial amounts of tooth structure. The upper left central incisor carried a preexisting crown.
Fig 16.4 Developmental hypodontia treated with dental implants without the need to prepare intact teeth to attach bridge retainers.
Fig 16.5 This patient, who has a missing upper left central incisor that was replaced with a removable denture, wants to maintain the interdental spaces. A dental implant avoids the need for a connector, which would be difficult to hide from view, attaching a bridge pontic to abutment(s).
No need for connectors between pontic and abutment teeth
Avoids mechanical risks of conventional bridges
The deep complete overbite—No need to accommodate a denture connector
Concurrent use of an implant as an orthodontic anchor
Fig 16.6 In occlusion, the deep complete overbite means that there is no space to accommodate a connector between a denture tooth and the major connector.
Fig 16.7 Four premolars have been replaced with two implants carrying provisional restorations. The right premolar is being used as an orthodontic anchor. Both implant crowns act as guides to appropriate tooth positioning within the arch.
Linking implant restorations together
Retrievability of the restoration
Denture retention and support
Fig 16.8 Implants in the posterior mandible linked by the restoration in order to help distribute occlusal loads.
Fig 16.9 The upper right central incisor is replaced by a restoration screwed directly to an implant. The screw access hole is not visible from the front.
To take advantage of machined fitting parts
What is the problem with an existing fixed restoration or the natural teeth?
Problematic bridgework
Fig 16.10 An overdenture using implants for both support and retention.
Fig 16.11 Transfer impression copings used to generate a working cast containing abutment replicas for an edentulous patient in preparation for a mandibular overdenture.
Periodontal disease
Fig 16.12 The grey discoloration at the central incisors due to adhesive bridge retainers attached to their palatal aspects would be avoided by the use of dental implants.
Unrestorable teeth
Is there a denture-related problem the patient wishes to solve?
Improved removable denture
Fixed restoration instead of removable denture?
Fig 16.13 A bar-retained implant overdenture in conjunction with maxillary anterior crowns.
Fig 16.14 A fixed implant restoration (B) to replace a removable denture (A) in a patient with an edentate maxilla.
Does the cause of missing or failing teeth have any influence on the indication for implants?
Periodontal disease
Congenital/developmental absence
Caries
Fig 16.15 Failure of teeth to develop makes implant provision for this patient challenging for several reasons.
Related to treatment for head and neck cancer
Trauma
Root resorption
Periradicular infection
Fig 16.16 A fixed implant bridge for a patient with a malignant tumour of the left posterior maxillary alveolus. At presentation (A), note the enlarged left maxillary alveolus. The tumour has been excised and the defect reconstructed using a vascularized composite fibular graft that has subsequently had implants inserted (B). An acrylic bridge is in place with silicone material used for provisional screw access hole closure (C and D). This patient did not receive radiotherapy.
Fig 16.17 Alveolar loss is evident after healing in a patient whose maxillary central incisors have been lost as a result of trauma.
Does the timing of tooth loss have any influence on indication for implants?
Fig 16.18 A mandibular second deciduous molar without a successor undergoing replacement resorption. It has inhibited local alveolar growth and gives the appearance of having become secondarily impacted as the adjacent teeth have tilted.
Fig 16.19 The cross section from a cone beam computed tomography scan (B) shows obvious periradicular bone loss at a root-treated maxillary right central incisor. The bone loss is much less easily seen on the periapical radiograph (A).
Fig 16.20 Remodelling on the buccal aspect of the alveolus (B) is evident 3 months after extraction of the fractured roots (A). It was deemed necessary to carry out preimplant bone grafting in order to facilitate implant placement (C).
What are the main drawbacks of implant treatment?
The need for surgery
Cost and duration of treatment
Lack of implant product standardization
Possible need for a tooth-free period
Difficulty achieving aesthetic perfection and easy access for oral hygiene
Are there contraindications to implant treatment?
Chapter 17 Assessing the patient for implant placement
What are the patient’s expectations and can they be safely met?
Does the treating team have the ability to meet the expectations of the patient?
What training has been undertaken?
Is the appropriate equipment available and are the practice premises suitable to carry out implant dentistry?
Is the patient able to give valid informed consent?
What are the time-scales for the completion of treatment?
Will the patient be able to attend for maintenance?
Can the patient afford the treatment and maintenance?
Fig 17.1 A patient presents with loss of a central incisor as a result of trauma.
Table 17.1 Questions that need to be addressed in a general assessment for possible implant treatment
Might there be periods during treatment without tooth replacement and how might teeth be replaced temporarily?
What side effects from surgery are to be expected, and what are the more unusual but significant risks?
Fig 17.2 Infraorbital bruising 1 week following single implant placement with guided bone regeneration in the anterior maxilla.
Will treatment involve the use of animal-derived products?
What is the likelihood of being able to satisfy the aesthetic desires of the patient?
Is it possible to communicate effectively to obtain a reliable history?
Does the patient have communication problems?
Are there any pre-existing general factors that might compromise the establishment of bone and soft tissue integration?
Does the patient smoke?
Has the patient had radiotherapy to the jaws?
Have bisphosphonates ever been prescribed?
Does the patient suffer from diabetes?
Fig 17.3 Assessing access for instrumentation to provide implant restoration in the posterior mandible.
Will it be possible to access the oral cavity to perform the required diagnostic, surgical, and prosthodontic procedures with acceptable risk?
Does the patient have a reduced oral aperture or mandibular opening range?
Is the patient able to recline in the dental chair to allow the operator to work in a safe and acceptable position?
Does the patient have a compromised airway protective reflex?
Is the patient able to cooperate during assessment and treatment?
Is the patient likely to tolerate surgery, anaesthetic, and anxiety management techniques with acceptable risk?
How will the patient be anaesthetized?
Is there a risk from ionizing radiation in pregnancy?
Is there any risk of compromised wound healing due to underlying medical conditions or the effect of current or past therapies?
Is the oral environment stable and disease-free?
Is there any evidence of pulpal/periapical disease, active caries, heavily restored teeth at risk of mechanical failure, or tooth wear?
What is the risk of future peri-implantitis?
Does the patient have good oral hygiene?
Is there a history of previous periodontitis or peri-implantitis?
Does the patient have a dry mouth?
Has there been a course of orthodontic treatment?
Are tooth positions stable?
Is gingival architecture mature?
Is the patient’s age relevant?
Has craniofacial growth ceased?
Fig 17.4 Implants have been placed at the maxillary canine sites to support cantilever bridges replacing the lateral incisors after a course of orthodontic treatment. A vacuum-formed retainer has been provided to help prevent unwanted tooth movements.
Are there age-related co-morbidities?
Are there any lifestyles or habits that might influence treatment options or that might pose a risk to implant restoration longevity?
Chapter 18 Treatment planning
What is the overall treatment objective?
Is the final restoration to be fixed or removable by the patient?
What are the diagnoses and constraints for treatment and maintenance?
What are the aesthetic goals?
Which teeth are to be replaced in part-dentate patients?
What is the ideal form and position of the individual teeth to be replaced?
What is the ideal soft tissue frame of the teeth to be replaced?
Table 18.1 Questions that need to be addressed for planning dental implants
Fig 18.1 Using orthodontic planning casts, two options for replacement of teeth with implants are investigated (B and C) for a patient with congenitally missing premolars and a retained deciduous molar (65). Option C would be preferable from an implant perspective.
Fig 18.2 A trial denture gives a good guide to the form of the teeth to be replaced.
Does acceptable lip and facial support rely largely on the presence of a removable prosthesis?
Fig 18.3 A wax-up of the proposed restorations has been made for a patient who has completed orthodontic treatment to realign teeth in preparation for dental implants. The wax-up helps to analyse the prosthetic envelope of the proposed restorations, which in turn directs the three-dimensional positions of dental implants.
Fig 18.4 The trial tooth set up with well-proportioned teeth (A) shows that there is a significant alveolar deficit. If the deficit were to be replaced with teeth alone, they would have the appearance of gingival recession (B). If the compromise is unacceptable, this investigation reveals the need for exploring possibilities for replacement of alveolar tissue in the form of tissue grafts or by prosthetic means.
Fig 18.5 (A) Following loss of maxillary anterior teeth, tooth and flange elements of the denture are required to provide facial support. (B) There is a noticeable lack of upper lip support when the denture is removed.
Fig 18.6 Failure to appreciate the prosthetic requirements for an implant restoration at the maxillary left central incisor. Although from the anterior view (A) there appears to be sufficient space, the occlusal view (B) shows that the mandibular incisors encroach on the required prosthetic envelope. It was not possible to simply adjust the mandibular incisors enough to create space, and the final restoration is significantly compromised (C and D). The patient declined orthodontic treatment to realign the mandibular teeth.
What are the occlusal objectives?
Is there space within an existing tooth-borne occlusal scheme to accommodate the proposed arrangement of teeth to be replaced?
Is the proposed restoration protected in excursions?
Fig 18.7 Examples of space requirements for implant-restoration attachment mechanisms for a maxillary incisor. (A) A cemented restoration requires sufficient volume to accommodate an abutment with adequate resistance and retention to be screwed into the implant. (B) A crown screwed directly into the implant without an intervening abutment may require less interocclusal volume than the cemented alternative. The position of the implant in panel A would make it difficult to provide the style of restoration shown in panel B because masking a visible screw access hole would be problematic.
Fig 18.8 It is difficult for this patient to clean effectively around the implants that support a fixed restoration with a modest flange that provides lip support and gingival replacement.
Is there space within the prosthetic envelope of a denture to accommodate overdenture attachments?
What are the requirements to facilitate access for oral hygiene?
What are the ideal implant positions to satisfy the aesthetic, occlusal, and hygiene goals?
How deeply placed should implants be?
What should the mesiodistal position of implants be?
Fig 18.9 (A) A bar attached to two implants in the anterior mandible. (B) The implants need to be sufficiently far apart to allow an adequately long clip to be processed into the overdenture.
What should the buccolingual position of implants be?
What should the trajectory of the implants be?
What moderating factors indicate a departure from “one implant per missing tooth” for fixed restorations?
Narrow teeth
Edentate fixed restoration
How many implants for overdentures?
What support is intended for the overdenture?
Fig 18.10 (A) Two implants used to replace four missing teeth by means of cantilevered pontics. Four implants would not have allowed for adequate interimplant and tooth–implant space. (B) The contact points have been taken further toward the gingiva to reduce the space that papillae should fill.
Fig 18.11 Diagnostic wax-ups used to investigate alternative numbers of replacement teeth. It may be more difficult to achieve adequate implant spacing with the three-teeth option (A) than with the two-teeth option (B).
Fig 18.12 Six implants used to support a metallic framework that houses attachments (A) for both support and retention of an overdenture (B).
Fig 18.13 An implant overdenture that houses attachments will clip onto the ball abutments that have been screwed on to the underlying implants.
What are the ideal implant product features to satisfy the aesthetic, occlusal, and hygiene goals?
How wide should implants be?
How long should the implants be?
What about other implant product features?
Is satisfactory volume and quality of bone available to house the chosen implant products in the selected positions?
How much bone will remain after a tooth is extracted?
What can radiography show?
Fig 18.14 Transparent overlays matched to the magnification of a panoramic radiograph used to help select implant sizes.
Fig 18.15 Virtual implant placement performed on an image obtained by CBCT.
Will the peri-implant soft tissue be appropriate?
Is the peri-implant tissue attached mucosa or mobile alveolar mucosa?
Fig 18.16 Where the buccal aspects of these overdenture abutments emerge through mobile alveolar mucosa there is peri-implant inflammation.
If bone and/or soft tissue is lacking, can it be created?
It is anticipated that the implant will gain adequate primary stability from existing bone
It is anticipated that initial implant stability in existing bone cannot be achieved
It is anticipated that peri-implant soft tissue will be lacking
If bone or soft tissue is lacking, is it possible to proceed, accepting the risk of compromise?
What are the aesthetic risks?
Fig 18.17 Implant crowns at left central and lateral incisor sites. The contrast in the gingival architecture compared with the right-hand side is quite evident. Implants that are positioned without accommodating long-term tissue requirements make achieving satisfactory results in these already challenging situations even more difficult.
What are other possible compromise outcomes?
How will the patient make the transition to implant restoration?
Provisional fixed restoration borne by teeth
Provisional removable restoration
Provisional fixed restoration borne by implants
Immediate final restoration using implants
No provisional restoration
What is the stage-by-stage plan of treatment?
Chapter 19 Basic surgery for implant placement
Surgical placement of an implant to replace an upper first molar
Summary
History
Complaint
History of complaint
Dental history
Examination
Intraoral examination
Radiographic examination
What is the diagnosis and what factors will determine the prognosis of this tooth?
What replacement restorations would you consider and why?
Fig 19.1 Occlusal view of maxillary dentition.
Fig 19.2 Radiograph of UR6 showing undercondensed root fillings with radiolucency in the furcation area.
Fig 19.3 Removal of the existing restoration and underlying core, demonstrating lack of adequate coronal dentine.
Preimplant assessment
What factors would you consider when planning an implant to replace a maxillary and a mandibular molar?
Describe the surgical technique pertinent to molar region
Table 19.1 Factors to assess when considering implant replacement of molar teeth
Fig 19.4 Radiograph showing limited alveolar ridge height due to position of the maxillary sinus floor.
Fig 19.5 A cross-sectional view of mental foramen and mandibular canal.
Fig 19.6 An appropriate-diameter implant to replace a molar tooth. The shape of the implant allows an ideal emergence for a molar tooth to be developed.
Fig 19.7 System-specific drills for preparing the implant osteotomy sites. Each manufacturer offers drills specifically for its implant system.
Fig 19.8 A typical implant site prepared in a correct three-dimensional position.
Immediate implant placement to replace two upper premolars
Summary
Fig 19.9 A transmucosal implant immediately after placement.
Fig 19.10 Implant abutment screwed in place and ready for restoration.
History
Complaint
Fig 19.11 Definitive restoration showing a good aesthetic outcome.
Fig 19.12 Occlusal view of UL4 and UL5 showing gingival-level fracture in both teeth.
History of complaint
Dental history
Examination
Intraoral examination
Radiographic examination
What is the prognosis for these teeth?
What replacement restorations would you consider and why?
Fig 19.13 Failed endodontic treatment in both UL4 and UL5 with periapical pathologies.
What surgical protocols would you consider for implant placement? Discuss the risks and benefits
Preimplant assessment
Describe the surgical technique, with particular consideration for immediate implant placement
Table 19.2 Comparison of immediate and delayed implant placement protocols
Fig 19.14 Two implants in correct position to facilitate future restorations.
Replacement of an upper central incisor with a dental implant
Summary
Fig 19.15 Implants are transmucosal to allow single-stage surgical procedure.
Fig 19.16 Definitive screw-retained crowns on UL4 and UL5. Note the excellent peri-implant soft tissue health and aesthetic outcome.
History
Complaint
History of complaint
Dental history
Examination
Intraoral examination
Radiographic examination
What replacement restorations would you consider and why?
Preimplant assessment
What important factors would you assess when replacing implants in the aesthetic zone?
Fig 19.17 Pre-op frontal view. UR1 is missing, and there is a minor vertical soft tissue deficiency.
Describe the surgical technique most appropriate for the highly demanding aesthetic zone
Table 19.3 Factors to assess when considering implants in the aesthetic zone
Fig 19.18 Pre-op radiograph of the implant site.
Fig 19.19 Pre-op photo showing adequate tissue volume.
Fig 19.20 Implant depth being confirmed with a surgical guide.
Fig 19.21 Ideal three-dimensional labiopalatal position being verified by the surgical guide.
Fig 19.22 Post-op view of single-tooth implant restoration in UR1.
Summary
Chapter 20 Managing bone deficiencies for implant surgery
Surgical placement of an implant with simultaneous guided bone regeneration
Summary
History
Complaint
History of complaint
Dental history
Examination
Intraoral examination
Radiographic examination
What important factors would you consider when placing implants with simultaneous GBR?
Table 20.1 Advantages and disadvantages of staged and simultaneous bone augmentation
Fig 20.1 A missing UR1 that has been replaced with a resin-bonded cantilever bridge from UL1.
Fig 20.2 Alveolar ridge assessment shows lateral ridge resorption.
Fig 20.3 A periapical radiograph confirming satisfactory vertical bone level.
Fig 20.4 A narrow ridge is confirmed at the time of surgery.
Describe the surgical technique of simultaneous GBR
Fig 20.5 Direction indicator confirming the position of prepared implant site.
Fig 20.6 A large dehiscence-type defect on the labial aspect. Corticotomy holes prepared for GBR procedure.
Fig 20.7 GBR procedure with initial layer of autogenous bone chips over the exposed implant surface.
Fig 20.8 Alveolar ridge contour redeveloped using particulate bovine bone substitute.
Fig 20.9 Bilayer porcine collagen membrane applied over the bone graft.
Fig 20.10 Tension-free primary closure is essential to ensure success of GBR procedure and prevent flap dehiscence.
Fig 20.11 Provisional restoration allows soft tissue moulding to optimize pink aesthetics.
Fig 20.12 Ideal emergence created with the help of the provisional restoration.
Fig 20.13 Definitive crown restoring both pink and white aesthetics.
Fig 20.14 Note the alveolar contour that has been redeveloped with the GBR procedure.
Surgical placement of an implant after staged augmentation with block bone graft
Summary
History
Complaint
History of complaint
Dental history
Examination
Intraoral examination
Radiographic examination
Fig 20.15 Pre-op view of missing UL1.
Fig 20.16 Occlusal view showing the extent of lateral ridge resorption.
Fig 20.17 Cross-sectional views of UL1 confirming lack of alveolar ridge width.
Describe the surgical technique for block bone grafting
Fig 20.18 A narrow ridge in UL1.
Fig 20.19 Despite lateral resorption, vertical bone height is maintained.
Fig 20.20 Corticocancellous bone block is harvested from anterior symphyseal region.
Fig 20.21 Corticotomy holes to promote angiogenesis in the recipient site.
Fig 20.22 Surgical template used to confirm graft positioning.
Fig 20.23 Occlusal view of the secured bone graft. It is desirable to overaugment the site to compensate for graft remodelling.
Fig 20.24 Facial view of the bone block that has been screwed in place for stability.
Fig 20.25 Successful graft integration at the time of implant placement surgery after 5 months.
Fig 20.26 Occlusal view showing excellent ridge width reconstruction.
Conclusion
Fig 20.27 Adequate bone volume allows an ideal implant position.
Chapter 21 Restorative options in implant dentistry
What are the techniques for transferring the implant position to a working cast?
What is an implant abutment and what are the various available types?
Fig 21.1 A cross section of an implant showing the internal antirotational feature.
Fig 21.2 Screw-retained impression coping that is incompletely seated.
Fig 21.3 Screw-retained impression coping fully engaging the internal antirotational features and fully seated for accurate impression.
Fig 21.4 Custom tray with an opening allowing access to impression coping to facilitate removal after setting of the material.
Fig 21.5 The impression coping retained within the set impression material.
Fig 21.6 Inside view of the impression with an embedded impression coping.
What are the methods of attaching a restoration to the dental implant?
Fig 21.7 A typical implant analogue that mimics the shape of a particular implant system and type.
Fig 21.8 Two implant analogues are attached to the two impression copings in this particular case.
Single-tooth posterior replacement
Posterior cement-retained crown
Fig 21.9 A working cast with pink-coloured silicone gingival mask and implant abutments.
Posterior screw-retained crown
Fig 21.10 Prefabricated (A) screw-retained abutment, (B) straight-cemented abutment, and (C) angled abutment.
Fig 21.11 (A–C) Customizable titanium abutment can been trimmed to shape and margins are placed at or just below the gingival level. A cementable crown can be fabricated, allowing easy access to cement.
Fig 21.12 (A) An example of a castable abutment. (B and C) The burnout plastic sleeve is trimmed and an abutment is designed in wax prior to casting.
Anterior cement-retained crown
Fig 21.13 Zirconia abutments and two corresponding crowns with zirconia inner copings.
Fig 21.14 (A) An implant replacing LL6. (B) Closed-tray impression coping secured on top of the implant immediately prior to impression. (C and D) A prefabricated cementable abutment, if modified in the laboratory, should be relocated in exactly the same orientation and position in the mouth. (E) Bonded-ceramic crown is cemented in place.
Fig 21.15 (A) Implant replacing LL5. (B) A periapical radiograph shows that the implant shoulder is subcrestal. (C and D) A screw-retained crown is fabricated in this case, and the ceramic is directly laminated on the zirconia abutment.
Fig 21.16 (A) Preoperative view of missing upper central incisors. (B and C) Provisional crowns used for pe
People also search for Clinical Problem Solving in Periodontology and Implantology 1st:
clinical problem solving in periodontolog
clinical problem solving in periodontology and implantology pdf
clinical problem solving examples
clinical problem solving skills
clinical problem solving in periodontology
You may also like…
eBook PDF
Clinical Problem Solving in Dentistry 3rd Edition by Edward Odell ISBN 0702044075 9780702044076


eBook PDF
Clinical Problem Solving in Prosthodontics 1st Edition by David Bartlett 0443072825 978-0443072826