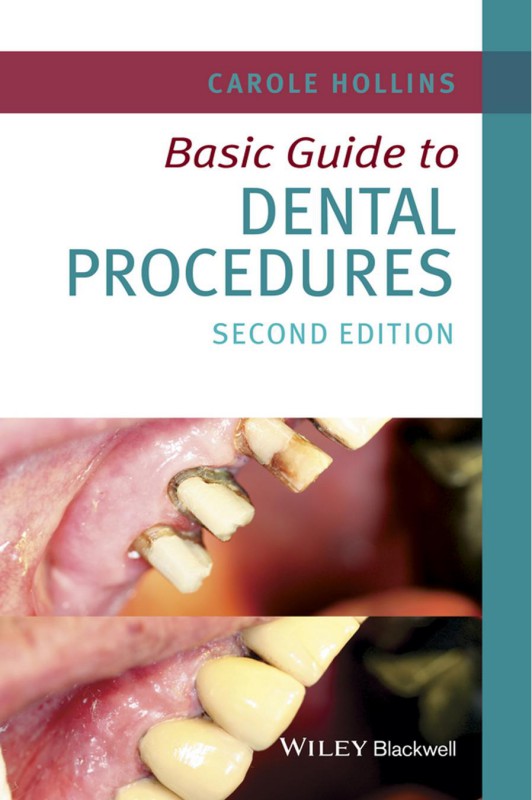
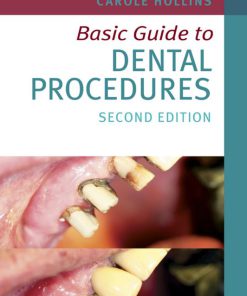
Basic Guide to Dental Procedures 2nd edition by Carole Hollins 9781119064879 1119064872
$50.00 Original price was: $50.00.$25.00Current price is: $25.00.
Authors:Carole Hollins , Series:Dentistry [4] , Tags:Medical; Dentistry; General , Author sort:Hollins, Carole , Ids:Google; 9781118702611 , Languages:Languages:eng , Published:Published:May 2013 , Publisher:John Wiley & Sons , Comments:Comments:The Basic Guide to Dental Procedures provides an indispensable induction to the core preventative and restorative treatments routinely carried out in the modern dental practice. Written as an introductory guide for the whole dental team, it makes no attempt to explain the theory and clinical technique behind each procedure in detail. Rather, with the aid of ‘before and after’ colour illustration it offers sufficient overview to enable the reader to understand and explain procedures to their patient with confidence. Each section is clearly structured to cover the reasoning behind the treatment described, the relevant dental background, the basics of how each procedure is carried out and if applicable, aftercare information.
Basic Guide to Dental Procedures 2nd edition by Carole Hollins – Ebook PDF Instant Download/Delivery.9781119064879,1119064872
Full download Basic Guide to Dental Procedures 2nd edition after payment
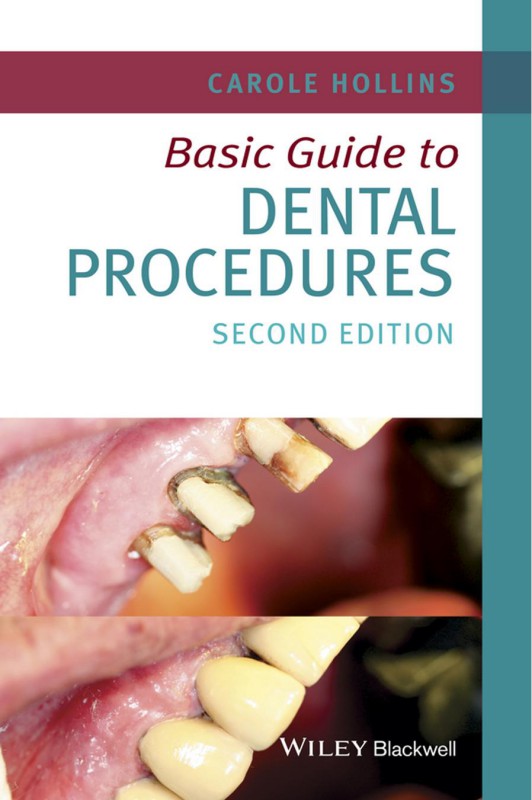
Product details:
ISBN 10:1119064872
ISBN 13:9781119064879
Author:Carole Hollins
Basic Guide to Dental Procedures, Second Edition provides an essential introduction to the core preventative and restorative treatments routinely carried out in the modern dental practice. Written as a guide for the whole dental team, ‘before and after’ colour photographs enable the reader to understand and explain the procedures to their patient with confidence. Each section is clearly structured to cover the reasoning behind the treatment described, the relevant dental background, the basics of how each procedure is carried out and any necessary aftercare information.
Key features include:
- Colour photographs throughout combined with concise text to highlight the crucial points of each procedure
- Suitable for the whole dental team, from office support staff to the dentist explaining procedures to a patient
- Thoroughly updated and revised in line with the substantial changes to the role and professional obligations of the dental nurse, including a new chapter detailing extended duties
- The new images of tray set-ups means it is an ideal companion for trainee dental nurses studying for the NEBDN OSCE exam
Basic Guide to Dental Procedures 2nd Table of contents:
Chapter 1 Preventive techniques
REASON FOR PROCEDURE
BACKGROUND INFORMATION OF PROCEDURE – FISSURE SEALANTS
Figure 1.1 Molar tooth model showing occlusal fissure system
DETAILS OF PROCEDURE – FISSURE SEALANTS
TECHNIQUE:
Figure 1.2 Fissure sealant instruments and materials
Figure 1.3 Tooth isolation techniques
BACKGROUND INFORMATION OF PROCEDURE – TOPICAL FLUORIDE
DETAILS OF PROCEDURE – FULL MOUTH TOPICAL FLUORIDE APPLICATION
Figure 1.4 Fluoride gel for professional application – Duraphat
TECHNIQUE:
DETAILS OF PROCEDURE – SPECIFIC TOOTH TOPICAL FLUORIDE APPLICATION
Figure 1.5 Brown spot lesion indicating previous enamel damage
Chapter 2 Oral hygiene instruction
REASON FOR PROCEDURE
BACKGROUND INFORMATION OF PROCEDURE – DISCLOSING AGENTS
Figure 2.1 Disclosing tablets
Figure 2.2 Disclosed teeth showing the presence of plaque
DETAILS OF PROCEDURE – DISCLOSING AGENTS
Figure 2.3 Appearance of undisclosed gingival plaque
TECHNIQUE:
BACKGROUND INFORMATION OF PROCEDURE – TOOTHBRUSHING
DETAILS OF PROCEDURE – TOOTHBRUSHING
Figure 2.4 Examples of various toothpastes
TECHNIQUE:
Figure 2.5 Tooth brushing the gingival margins
Figure 2.6 Comparison of new and worn toothbrush
BACKGROUND INFORMATION OF PROCEDURE – INTERDENTAL CLEANING
Figure 2.7 Contact points of the teeth
Figure 2.8 Interdental ‘flossettes’
DETAILS OF PROCEDURE – FLOSSING
Figure 2.9 Examples of dental floss and tape products
TECHNIQUE:
DETAILS OF PROCEDURE – INTERDENTAL BRUSHING
Figure 2.10 Correct positioning of floss around fingers
Figure 2.11 Flossing technique
TECHNIQUE:
Figure 2.12 Interdental brush design
Figure 2.13 Size range of interdental brushes
Figure 2.14 Use of interdental brush for posterior cleaning
Figure 2.15 Electric brush attachment for interdental cleaning
Chapter 3 Scaling and polishing
REASON FOR PROCEDURE
Figure 3.1 Supragingival calculus
BACKGROUND INFORMATION OF PROCEDURE – SCALING
DETAILS OF PROCEDURE – SIMPLE SCALING
Figure 3.2 Ultrasonic scaler showing water spray effect
Figure 3.3 Supragingival scalers. (a) Sickle scaler. (b) Jaquette scaler. (c) Push scaler
Figure 3.4 Instruments and materials for simple scale and polish procedure. (a) Prophylaxis paste. (b) Ultrasonic scaler. (c) Hand scalers. (d) Polishing brush with handpiece
TECHNIQUE:
DETAILS OF PROCEDURE – DEEP SCALING AND DEBRIDEMENT
Figure 3.5 Personal protective equipment. (a) Oral health team members – gloves, mask and eye protection. (b) Patient – bib and safety glasses
Figure 3.6 Appearance after completion of supragingival scaling
TECHNIQUE:
Figure 3.7 Currettes for subgingival scaling and debridement
Figure 3.8 Local anaesthetic equipment. (a) Topical anaesthetic and cotton wool roll. (b) Syringe – aspirating or non-aspirating. (c) Cartridge – content specific to patient need. (d) Needle – long or short
BACKGROUND INFORMATION OF PROCEDURE – POLISHING
DETAILS OF PROCEDURE – POLISHING
Figure 3.9 Polishing brush and cup in dental hand pieces
TECHNIQUE:
Chapter 4 Diagnostic techniques
REASON FOR PROCEDURE
BACKGROUND INFORMATION OF PROCEDURE – INSTRUMENTS
DETAILS OF PROCEDURE – INSTRUMENTS
Figure 4.1 Cavity in tooth
Figure 4.2 Diagnostic probes. (a) Right angle probe. (b) Briault probe. (c) Sickle probe. (d) Periodontal BPE probe
TECHNIQUE:
TECHNIQUE:
BACKGROUND INFORMATION OF PROCEDURE – DENTAL RADIOGRAPHS
Figure 4.3 BPE probe inserted in periodontal pocket
DETAILS OF PROCEDURE – DENTAL RADIOGRAPHS
Figure 4.4 Examples of intra-oral radiographic views. (a) Bitewings. (b) Periapical. (c) Upper occlusal
Figure 4.5 Dental pantomograph
Figure 4.6 Lateral skull view
TECHNIQUE:
Figure 4.7 Examples of film holders. (a) Bitewing holder. (b) Anterior periapical holder. (c) Posterior periapical holder
BACKGROUND INFORMATION OF PROCEDURE – STUDY MODELS
Figure 4.8 Film packet and holder in place ready for exposure
Figure 4.9 Patient positioned in DPT machine
Figure 4.10 Set of simple study models
DETAILS OF PROCEDURE – STUDY MODELS
Figure 4.11 Equipment and materials for taking a set of simple study models
TECHNIQUE:
Chapter 5 Tooth restoration with fillings
REASON FOR PROCEDURE
BACKGROUND INFORMATION OF PROCEDURE – AMALGAM FILLINGS
DETAILS OF PROCEDURE – AMALGAM FILLINGS
TECHNIQUE:
Figure 5.1 Instruments and materials for amalgam filling procedure. (a) Moisture control items. (b) Hand instruments. (c) Amalgam capsule, well and carrier
Figure 5.2 Completed amalgam filling
BACKGROUND INFORMATION OF PROCEDURE – COMPOSITE FILLINGS
DETAILS OF PROCEDURE – COMPOSITE FILLINGS
Figure 5.3 Rubber dam instruments. (a) Dam punch. (b) Dam clamp forceps, with clamp. (c) Dam frame. (d) Selection of other clamps
Figure 5.4 Equipment and materials for composite filling procedure. (a) Acid etchant. (b) Resin and applicator. (c) Composite material example. (d) Transparent matrix strip. (e) Finishing strip. (f) Articulating paper
TECHNIQUE:
Figure 5.5 Rubber dam in place on lower molar tooth
BACKGROUND INFORMATION OF PROCEDURE – GLASS IONOMER FILLINGS
Figure 5.6 Completed composite filling – old filling shown as new one is not easily visible
DETAILS OF PROCEDURE – GLASS IONOMER FILLINGS
TECHNIQUE:
Figure 5.7 Equipment and materials for glass ionomer filling procedure. (a) Conditioning liquid and applicator. (b) Powder and liquid filling material example. (c) Waxed pad, spatula, and measuring scoop. (d) Varnish and applicator
AFTERCARE OF FILLINGS
Figure 5.8 Completed glass ionomer filling on lower molar
Chapter 6 Tooth restoration with crowns, bridges, veneers or inlays
REASON FOR PROCEDURE – CROWNS
BACKGROUND INFORMATION OF PROCEDURE – CROWNS
DETAILS OF PROCEDURE – CROWNS
Figure 6.1 Equipment and materials for crown preparation procedure. (a) Elastomer based impression material example. (b) Selection of impression trays. (c) Temporary crown form example
TECHNIQUE:
Figure 6.2 Teeth prepared for crown procedure
Figure 6.3 Temporary crowns in place on the upper left incisors
Figure 6.4 Equipment and materials for crown cementation procedure. (a) Mixing pad and spatula. (b) Luting cement example. (c) Articulating paper
Figure 6.5 Cemented crowns
AFTERCARE OF CROWNS
BACKGROUND INFORMATION OF PROCEDURE – BRIDGES
DETAILS OF PROCEDURE – BRIDGES
TECHNIQUE:
AFTERCARE OF BRIDGES
Figure 6.6 Superfloss for cleaning beneath a bridge pontic
BACKGROUND INFORMATION OF PROCEDURE – VENEERS
DETAILS OF PROCEDURE – VENEERS
TECHNIQUE:
Figure 6.7 Tooth preparation for veneers
Figure 6.8 Equipment and materials for veneer cementation procedure. (a) Acid etchant. (b) Resin and applicator. (c) Veneer luting cement example. (d) Mixing pad and spatula
Figure 6.9 Cemented porcelain veneers
AFTERCARE OF VENEERS
REASON FOR PROCEDURE – INLAYS
BACKGROUND INFORMATION OF PROCEDURE – INLAYS
DETAILS OF PROCEDURE – INLAYS
TECHNIQUE:
AFTERCARE OF INLAYS
Figure 6.10 Inlay preparation with in-filled undercuts
Figure 6.11 Inlay cemented in tooth
Chapter 7 Tooth restoration with endodontic techniques
REASON FOR PROCEDURE
BACKGROUND INFORMATION OF PROCEDURE – PULP CAPPING
DETAILS OF PROCEDURE – PULP CAPPING
TECHNIQUE:
BACKGROUND INFORMATION OF PROCEDURE – PULPOTOMY
Figure 7.1 Illustration of pulp capping technique
DETAILS OF PROCEDURE – PULPOTOMY
TECHNIQUE:
BACKGROUND INFORMATION OF PROCEDURE – PULPECTOMY
Figure 7.2 ‘Gum boil’ appearance of a chronic infection
DETAILS OF PROCEDURE – PULPECTOMY
TECHNIQUE:
Figure 7.3 Equipment and materials for pulpectomy procedure. (a) Barbed broach and hand files. (b) Paper points. (c) Gutta percha points and finger spreader. (d) Irrigation syringe and needle. (e) Measuring ruler. (f) Sealing material example
AFTERCARE OF ROOT-TREATED TEETH
BACKGROUND INFORMATION OF PROCEDURE – APICECTOMY
DETAILS OF PROCEDURE – APICECTOMY
Figure 7.4 Examples of surgical instruments to carry out an apicectomy procedure. (a) Scalpel blade and handle. (b) Instruments to raise the tissue flap off the bone and remove infected soft tissue. (c) Micro-head with bur to prepare root cavity. (d) Suturing equipment
TECHNIQUE:
PATIENT AFTERCARE FOLLOWING MINOR ORAL SURGERY
Chapter 8 Tooth extraction
REASON FOR PROCEDURE
BACKGROUND INFORMATION OF PROCEDURE – SIMPLE EXTRACTIONS
DETAILS OF PROCEDURE – SIMPLE EXTRACTIONS
TECHNIQUE:
Figure 8.1 Examples of extraction forceps. (a) Upper anterior and premolar teeth/roots. (b) Upper molar teeth/roots. (c) Lower teeth and roots
Figure 8.2 Examples of other extraction instruments. (a) Luxator. (b) Elevators
Figure 8.3 Example of written post-operative instruction leaflet
PATIENT AFTERCARE FOLLOWING A SIMPLE EXTRACTION
BACKGROUND INFORMATION OF PROCEDURE – SURGICAL EXTRACTIONS
DETAILS OF PROCEDURE – SURGICAL EXTRACTIONS
TECHNIQUE:
PATIENT AFTERCARE FOLLOWING A SURGICAL EXTRACTION
Chapter 9 Tooth replacement with dentures
REASON FOR PROCEDURE
BACKGROUND INFORMATION OF PROCEDURE – ACRYLIC DENTURES
Figure 9.1 Examples of acrylic dentures. (a) Full upper denture. (b) Partial upper denture with clasp, on model
DETAILS OF PROCEDURE – ACRYLIC DENTURES
TECHNIQUE:
Figure 9.2 Second stage of denture construction. (a) Wax bite rims on models. (b) Special trays
BACKGROUND INFORMATION OF PROCEDURE – CHROME DENTURES
Figure 9.3 Equipment and materials for the bite recording stage. (a) Wax knife, carver and pink wax. (b) Bite gauge. (c) Heat source
Figure 9.4 Try-in stage of lower full denture
Figure 9.5 Equipment and materials for the fitting stage. (a) Straight hand piece and acrylic bur. (b) Articulating paper. (c) Pliers to adjust clasps
Figure 9.6 Example of chrome-cobalt partial denture on model
DETAILS OF PROCEDURE – CHROME DENTURES
TECHNIQUE:
Figure 9.7 Chrome and tooth try-in on model
BACKGROUND INFORMATION OF PROCEDURE – IMMEDIATE REPLACEMENT DENTURES
DETAILS OF PROCEDURE – IMMEDIATE REPLACEMENT DENTURES
TECHNIQUE:
AFTERCARE OF DENTURES
Figure 9.8 Examples of denture cleaning products
Chapter 10 Tooth replacement with implants
REASON FOR PROCEDURE
BACKGROUND INFORMATION OF PROCEDURE – SINGLE TOOTH IMPLANT
DETAILS OF PROCEDURE – SINGLE TOOTH IMPLANT
Figure 10.1 Example of implant kit
TECHNIQUE:
Figure 10.2 Personal protective equipment suitable for an implant procedure
Figure 10.3 Example of implant placement hand piece and irrigation system
Figure 10.4 Radiograph showing position of implant cylinder
Figure 10.5 Implant head in place
AFTERCARE OF IMPLANTS
Chapter 11 Tooth alignment with orthodontic appliances
REASON FOR PROCEDURE
BACKGROUND INFORMATION OF PROCEDURE – REMOVABLE APPLIANCES
Figure 11.1 Proclined incisors with damage evident to the left tooth
Figure 11.2 Examples of removable appliances
DETAILS OF PROCEDURE – REMOVABLE APPLIANCES
TECHNIQUE:
Figure 11.3 Removable appliance in the mouth
Figure 11.4 Activated spring on the right incisor
BACKGROUND INFORMATION OF PROCEDURE – CONVENTIONAL FIXED APPLIANCES
Figure 11.5 Conventional upper fixed appliance in place
DETAILS OF PROCEDURE – FIXED APPLIANCES
Figure 11.6 Components of a conventional fixed appliance
Figure 11.7 Examples of materials and instruments for fixed appliance procedures. (a) Acid etch and bonding material. (b) Bracket holders. (c) Elastic holders. (d) Archwire cutters
TECHNIQUE:
BACKGROUND INFORMATION OF PROCEDURE – SHORT-TERM COSMETIC FIXED APPLIANCES
DETAILS OF PROCEDURE – SHORT-TERM COSMETIC FIXED APPLIANCES
Figure 11.8 Prepared quadrant of short-term fixed appliance
TECHNIQUE:
Figure 11.9 Short-term cosmetic fixed appliance in place on model
BACKGROUND INFORMATION OF PROCEDURE – ALIGNERS
DETAILS OF PROCEDURE – ALIGNERS
AFTERCARE OF ORTHODONTIC BRACES
Figure 11.10 Orthodontic head for an electric toothbrush
Chapter 12 Tooth whitening
REASON FOR PROCEDURE
BACKGROUND INFORMATION OF PROCEDURE – HOME TRAY WHITENING
DETAILS OF PROCEDURE – HOME TRAY WHITENING
TECHNIQUE:
BACKGROUND INFORMATION OF PROCEDURE – POWER WHITENING
Figure 12.1 Home whitening tray on spaced model
DETAILS OF PROCEDURE – POWER WHITENING
TECHNIQUE:
Figure 12.2 Application of whitening agent into tray ‘well’
Figure 12.3 Soft tissue retraction and moisture control in place
Figure 12.4 Isolation of teeth before whitening
AFTERCARE OF WHITENED TEETH
Figure 12.5 ‘Zoom’ light in use
Figure 12.6 End result after power whitening of upper teeth
Figure 12.7 Examples of whitening oral healthcare products
Chapter 13 Extended duties of the dental nurse
Reason for Inclusion
BACKGROUND INFORMATION ON BASIC DUTIES
BACKGROUND INFORMATION ON EXTENDED DUTIES
FURTHER SKILLS IN ORAL HEALTH EDUCATION AND ORAL HEALTH PROMOTION
SIMPLE BRUSHING, FLOSSING AND INTERDENTAL CLEANING INSTRUCTIONS
Figure 13.1 Examples of aids and products for use during OHI session. (a) Demonstration model. (b) Disclosing tablets. (c) Tooth brushes. (d) Toothpastes
Tooth brushing
TECHNIQUE:
Figure 13.2 Dental nurse demonstrating child tooth brushing techniques
Flossing and interdental cleaning
TECHNIQUE:
DIET ADVICE
Figure 13.3 Interdental and interspace brushes
Figure 13.4 Interdental brush angled to aid use
ASSISTING IN THE TREATMENT OF PATIENTS WHO ARE UNDER CONSCIOUS SEDATION
Intravenous sedation
Figure 13.5 Example of items to set out for intravenous sedation. (a) Intravenous drug and antidote. (b) Selection of cannulas. (c) Syringe and needle to draw up agents. (d) Tourniquet and tape
Figure 13.6 (a) Example of a combined pulse oximeter and blood pressure machine (b) Dedicated blood pressure machine in use
Monitoring the patient during the procedure
Figure 13.7 Example of an intravenous sedation monitoring sheet
Inhalation sedation
Figure 13.8 Inhalation sedation machine in use with nasal hood in place
Pre-operative checks
Figure 13.9 Nitrous oxide tank, valve and gauge
Figure 13.10 Oxygen flush button
FURTHER SKILLS IN ASSISTING IN THE TREATMENT OF ORTHODONTIC PATIENTS
Laying out instruments and materials
Figure 13.11 Fixed appliance instruments. (a) Wire cutters. (b) Bracket removers. (c) Band removers
Setting up for a bonding procedure
Figure 13.12 Orientation card ready for upper bonding
Orthodontic oral hygiene instruction
Figure 13.13 Use of interdental brush to clean beneath the arch wire
Measurement and recording of plaque indices
METHOD 1:
METHOD 2:
TAKING IMPRESSIONS
Figure 13.14 Examples of plaque index recording methods. (a) Variation of standard periodontal chart. (b) Pre-printed dental arches
Selection of the trays
Mixing of the alginate and loading of the trays
Figure 13.15 Sizing of tray for impression taking. (a) Tray catching molar teeth – too narrow. (b) Correct tray size, just covering the dental arch
Figure 13.16 (a–e) Alginate mixing and tray loading
Insertion of the trays
Removal of the trays after setting
Monitoring and handling of the patient
Figure 13.17 Example of an upper alginate impression
CONSTRUCTING BLEACHING TRAYS
Figure 13.18 EVA tray material pack
Figure 13.19 Example of a vacuum tray machine
Figure 13.20 Machine loaded with model and tray material
Figure 13.21 Warmed EVA sheet ready for use
Figure 13.22 Bleaching tray trimmed and ready for use
INTRA- AND EXTRA-ORAL PHOTOGRAPHY
Figure 13.23 Digital camera and ring flash
Figure 13.24 Lip retractors and intra-oral mirror
Figure 13.25 Portrait view
Figure 13.26 Intra-oral view
REMOVING SUTURES
Figure 13.27 Examples of memory card readers and adapters
Figure 13.28 Suture removal instruments
Figure 13.29 Holding suture end taut while cutting through the loop
Post-operative advice
People also search for Basic Guide to Dental Procedures 2nd:
basic guide to dental instruments pdf download
basic dental code
basic dental procedure codes
basic guide to dental procedures
basic dental guide
You may also like…
eBook PDF
Questions and Answers for Dental Nurses 3rd Edition by Carole Hollins ISBN 1118341643 9781118341643
eBook PDF
Levison Textbook for Dental Nurses 10th Edition by Carole Hollins ISBN 1405175575 9781405175579
eBook PDF
Basic Guide to Dental Procedures 1st Edition by Carole Hollins ISBN 1405153970 9781405153973
eBook PDF
Levison Textbook for Dental Nurses 10th edition by Carole Hollins 1405175575 9781405175579

